Aug 12 - Building Block Centers
Aug 19 - Building Block Surround
Aug 26 - Piecing Top and Grand Prize Linky
Sept 16 - Star Surround Parade and Grand Prize Winners
The Flying Geese Assignment winner who gets two Aspen Frost Charm Packs from The Rustic Rooster Quilt Shop is #65 - Wendi @ Bethadee Zoo !!! - Congrats :)
So, let's get to it. To make a star center, you will need to grab one pile of HST's and 4 background squares that are 4 1/2" x 4 1/2". From the piles of HST's you will want to remove 2 Background/Fabric A and 2 Background/Fabric B HST's and set them aside for another day. So you should have 16 HST's that look something like this :)
Lay the 16 HST's out as follows. Now a note on sewing these together. I only sew one center at a time rather than chain stitch 9 of them at a time. The reason for this is because it is so easy to accidentally sew the layout wrong. Every time I sew, you will see that I lay my pieces out in a star again. This helps me from getting twisted up. So, with that, I will let you make the decision. Please feel free to chain stitch all your stars if you like, just pay really close attention :)
And now, you have another decision. How do you want to sew your stars together. There are lots of ways to choose from, and obviously, I have only done a tutorial for one way, but if it isn't the way you like, please sew yours as you prefer. You can sew the pieces into rows and then the rows into a block.
You can sew the pieces into columns and then the columns into a block.
You can sew the center into a square, add the 2 sides, and then finish by adding the top and bottom row.
But the way I like to sew these together, and the way I will be sharing, is sewing the pieces into 4 quadrants and then sewing the 4 quadrants into a block.
So, to start, place all of your pieces from the second and fourth column onto the first and third column with right sides together. Align the raw edges and stitch a 1/4" seam along the edge.
I do like to chain stitch all 8 of my sets at this point. Then I press them without trimming the threads so I ensure that they are all in the same order to lay back out into the star. I found while working on this, that pressing open really helps everything to lay flat. But feel free to press to your own preference.
Once you have pressed your pairs, lay them back out into a star. It should look something like this.
Now, take the top pair in each quadrant and lay it onto the bottom pair with right sides together. Match the center seams and pin them in place. Now you will notice, my top 2 are pressed to the side but I later wished I would have pressed them open.
Also, the great thing about open seams is you can see where the HST's meet in your seams and sew your 1/4" seam right along the bottom of your other fabric triangle snippet allowing you to have perfect points. (This picture isn't from this stage in the sewing as it was an afterthought to take it, but it does illustrate the little triangle seam snippets quite well :) Press the seams.
Place the right hand quadrants onto the left hand quadrants with right sides together. Match the center seams again and pin them in place. Sew a 1/4" seam along the pinned edge and press, taking care to sew right along the bottom of that little snippet in the seam and your points will be so crisp :)
And now you have 2 halves. Only one seam left.
Place to top half onto the bottom half with right sides together. Take care to match all 3 seams and pin them in place. Sew a 1/4" seam along the pinned edge, once again watching all of those little seam triangle snippets to guide your seam. Press.
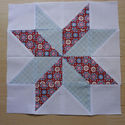
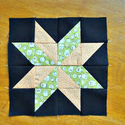
And you have a beautiful star center!! Now just rinse and repeat for how ever many blocks you are making.
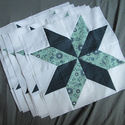
And here are my blocks all finished. Sorry about the horrible lighting, it was super late when I took this picture :)
And that's it!! Make up your star centers and your is complete!!! And now you can enter to win the weekly prize :)
The Weekly Prize is sponsored by The Scarlet Thread Quilt Co. and a huge thanks goes out to Julie for her support of the Star Surround Quilt-A-Long.
This weeks prize is 8 Fat Quarters from Parson Gray's new line Curious Nature. Oh my goodness, can I just say how much I love this line. Oh my, what a stunning quilt these would make!!
So what do you have to do for a chance to win these fat quarters? Simple . . . Just link up your Star Centers at the end of this post :) You can link to a blog post or a flickr picture, or whatever. Just make sure to link up by next Monday morning as I will be announcing a winner in next weeks post :)
If you don't get your Star Centers done by next week you can still link it up :) (just not in time for the prize :) The linky will remain open until the end of the Quilt-A-Long. So if your out of town, or just had a busy week, no worries!!! Just link up when you can :)
And don't forget to add your Stars to the Happy Quilting Quilt-A-Long Flickr group!!! I am just so excited to see these blocks starting to come together!!
So let's get sewing!!! And if you have questions, don't hesitate to email me at happyquiltingmelissa@gmail.com. Have a Happy Quilting Day!!
Link up this weeks assignment before next weeks post (Every Monday) for a chance to win the weekly prize shown above!! Happy Quilting!!!
| | | |
| | | |
| | | |
| | | |
| | | |
| | | |
| | | |
| | | |
| | | |
| | | |
| | | |
| | | |
| | | |
| | | |
| | | |
| | | |
| | | |
| | | |
| | | |
| | | |
| | | |
| | | |
| | | |
| | | |
| | | |
| | | |
| | | |
| | | |
| | | |
| | | |
| | | |
(Cannot add links: Registration/trial expired)


This quilt-a-long is so much fun.
ReplyDeleteHi Melissa-
ReplyDeleteI'm running into a bit of a problem that may just be me, but I wanted to check in to see if anyone else is having the same situation arise. The cutting instructions for the 4x4 scrappy layout, when you cut a total of 160 3" squares from the various fat quarters/half yards, or 10 from each of 16 fabrics. Those turn into 6 fabric A/Background, 6 B fabric/background, and 4 A/B HSTs. The 4 A/B HSTs are the very center of the star blocks.
So the cutting instructions will make 8 pinwheel centers (made of the 4 A/B HSTs), which is half the number you'll need for the 16 blocks in a 4x4 layout. I've just put together my quadrants for these instructions, have half the number of centers that I need for my layout. Is this just me? Thanks in advance!
Pam, I'm not sure how I did it, but I've done the same thing as you. Or at least think I did. What I have is two HST pieces of each combination. So I have half of the star center.
DeleteI've been scratching my head over this one and still haven't figured it out. I'm afraid by the time I've matched all my HSTs, that I'm going to find I have too many 1/2 white pieces....
Ramona @ ThreadTime.wordpress.com
Pam - I am also making the 4x4 scrappy and possibly I didn't pay attention, but I ended up with the right number of pieces. I knew I needed to cut five A's and five B's to get the four A/B HSTs and the six A/background and six B/background squares for each of the sixteen blocks for a total of 80 A and 80 B pieces (or 160 pieces) The center of each pinwheel only uses FOUR of the A/B HST's, the rest of the center star uses an A/Background or B/Background piece. Look at Melissa's and you will see that you should have plenty.
ReplyDeleteHmm... I'll go back and check my cutting step to see. Thanks, Ramona!
DeleteOk - true DERP moment. When I was reading the instructions for the HST step, it said you needed 4 A squares, 4 B squares, and 2 background squares *for each block*. Apparently I forgot I could make 2 blocks out of each pairing that I had cut. So I had all my parts cut correctly, but apparently only made half my HSTs.
DeleteI'm blaming the wine I drank while piecing and watching Project Runway that week. :)
I'm loving this quilt-a-long! It is so much fun and everything is coming together so nicely. Thanks so much for sharing this with us!
ReplyDeleteI am really loving Parson Gray fabrics. They are just awesome. I'm crossing my fingers and my toes on this one! :-D
ReplyDeleteOoooh, I need that fabric for sure:) This is moving along at a great pace Melissa. Glad to see it start to come together.
ReplyDeleteMelissa, thank you so much for your always clear instructions...so helpful, for a beginner like me.
ReplyDeleteCant wait to start putting mine together! I love the giveaway fabric too! hope i am lucky this week!
ReplyDeleteJessica
http://oneredcherry.blogspot.com.au/
Ready to make some stars and hope they turn out as good as yours! This is a great pace for a QAL and I'm really enjoying it. Thanks!
ReplyDeleteHaving loads of fun with this QAL. Hope to post my star pics soon. Love the Parson Gray fabric. Fingers crossed I'm lucky this week!
ReplyDeleteThat is some great fabric up for grabs. I think the way some of these lovely QAL participants are displaying their centers for their linkups would make great quilt tops along, I'm excited to get to the next part!
ReplyDeleteI am having so much fun with this QAL. Thank you so much for hosting Melissa. Oh and I just realised that I'm using very similar colours to yours. :-)
ReplyDeletebllissimo questo quilt -a- long,grazie Melissa
ReplyDeleteThis is so great. . thanks sweetie!
ReplyDeleteBack on board - thanks for your QA!
ReplyDeleteWhew! I made it:) I am a little nervous about next week...almost there!
ReplyDeleteI love this stage, where it all starts to come together and you start to get to see what it's going to look like! ;)
ReplyDelete