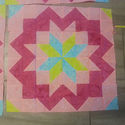
Aug 19 - Building Block Surround
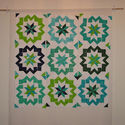
Aug 26 - Piecing Top and Grand Prize Linky
Sept 16 - Star Surround Parade and Grand Prize Winners
The Star Center Assignment winner who gets a 8 Fat Quarters from Parson Gray's new line Curious Nature from The Scarlet Thread Quilt Co. is #53- Kate!!! - Congrats :)
So, here is where we use up all the pieces that you have left. For each block in your project you will need to have 12 Flying Geese and 12 squares all of the same print. You will need 8 background squares. And finally, you will need 2 HST's. Now, which HST's you choose is your choice. I personally am using 2 of each print from the star that will be inside this particular surround. You can choose to lay yours out this way, or you can just randomly pick any HST's to mix it up a bit. Totally your decision.
But if you do decide to follow my lead and use the prints from the stars, I suggest matching each surround print to a star, just so you make sure you don't end up with any repeat prints in the end :)
This weeks assignment is broken into 2 parts the Corners and the Sides. We will start with the Corners.
CORNERS
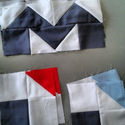
For each corner you will need 2 background squares, 1 HST, and 1 print square. You will be making 4 corners per block. Lay your 4 squares out as follows.
Place the right hand side squares onto the left hand squares with right sides together. Sew a 1/4" seam along the edges aligning as you go. Press towards the background fabric in both sets so your seams will nest.
Now, this part is pretty easy to chain stitch if you so desire. Simply make a big stack of print and background squares and sew them all in a big chain. Do the same for the HST and the background square, just take care that your HST is always facing the right direction.
Lay your top row onto your bottom with right sides together. Nest and pin your center seam in place. Sew a 1/4" seam along the pinned edge. Press your seam open. Once again, I liked to pin all of my pieces for all of my blocks and then chain stitch them. Just take care that you are adding the right tops to bottoms if you are not doing a random layout ;)
And you are done with a corner. If you haven't been chain stitching you will need to repeat the process to create a total of 4 corners for each block in your project.
SIDES
And now, you are ready to move onto the sides of the surround. For each side you will need 3 flying geese units and 2 print squares. You will be making a total of 4 sides per block. Lay your pieces out as follows.
We will be sewing the pieces into rows. For the top row, place the right hand side onto the left with right sides together. Sew a 1/4" seam along the edge and press seam open. For the bottom row, place a print square onto either side of the geese unit. Sew a 1/4" seam along each edge and press towards the print square.
Once again, this is another step that I found really helpful to chain stitch. I know, you are a pro at this now!!! For the top row, I sewed 4 sets of flying geese of each print in a row followed by the next 4 sets and sew on. When sewing these, I just aligned as I went, lifting the corner of each flying geese to make sure that my seams on the geese were aligning. That is what will give you the perfect point. I then chain stitched the second row adding the left hand square to the geese unit for all of my units and then clipping threads and going back and adding the right hand square.
When sewing your 1/4" seam, take care to sew directly along the bottom of the print "v" when sewing across the seam. This will give you a nice perfect point.
And your side is complete. If you haven't been chain stitching, you will want to repeat these steps to create a total of 4 sides per block in your project.
And that is this weeks assignment all completed. 4 Corners and 4 Sides for each of the blocks in your project.
The Weekly Prize is sponsored by Southern Fabric. and a huge thanks goes out to Aubrey for her support of the Star Surround Quilt-A-Long.
This weeks prize is $25.00 Gift Certificate to Southern Fabric!!. Yup, so you basically get to pic your own prize, so exciting!!!
So what do you have to do for a chance to win these fat quarters? Simple . . . Just link up your Surround pieces at the end of this post :) You can link to a blog post or a flickr picture, or whatever. Just make sure to link up by next Monday morning as I will be announcing a winner in next weeks post :)
If you don't get your Surround Pieces done by next week you can still link it up :) (just not in time for the prize :) The linky will remain open until the end of the Quilt-A-Long. So if your out of town, or just had a busy week, no worries!!! Just link up when you can :)
And don't forget to add your Stars to the Happy Quilting Quilt-A-Long Flickr group!!! I am just so excited, we are nearing the end!!
So let's get sewing!!! And if you have questions, don't hesitate to email me at happyquiltingmelissa@gmail.com. Have a Happy Quilting Day!!
Link up this weeks assignment before next weeks post (Every Monday) for a chance to win the weekly prize shown above!! Happy Quilting!!!
| | | |
| | | |
| | | |
| | | |
| | | |
| | | |
| | | |
| | | |
| | | |
| | | |
| | | |
| | | |
| | | |
| | | |
| | | |
| | | |
| | | |
| | | |
| | | |
| | | |
| | | |
| | | |
| | | |
| | | |
| | | |
| | | |
| | | |
| |
(Cannot add links: Registration/trial expired)


Congratulations, Kate!
ReplyDeleteI got just a bit too excited about the star surround and I just had to finish it. I love this 48 inch square one block quilt! I think I will make others too...
ReplyDeleteLucky Kate! Congrats!
ReplyDeleteCongratulations to Kate. Oh, we are making 'M's today!
ReplyDeleteWOW!!! just stumbled upon this QAL via design wall mondays at patchwork times and i just cant wait to get started on this! i have already made 2 quilts with these stars set differently.....i absolutely LOVE this setting and cant wait to start in on this as a scrappy quilt ;o)
ReplyDeleteHi Melissa,
ReplyDeleteMy first attempt to upload, something went wrong and no thumbnail shows. I relinked, but can't figure out how to delete my first attempt (#27). If you know how to delete it, please feel welcome to.
Thank you!
This is just amazing! I love how it's shaping up.
ReplyDeleteCan wait to finish this beauty up!
Can't wait to put these together!
ReplyDeleteI made it - a stellar # 63 on linky list! Wow - great participation!
ReplyDeleteGreat instructions and thanks for hosting!